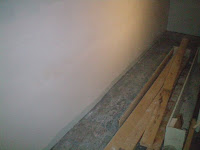
This past week, I managed to get the room itself finished, and have only a few steps left (although daunting ones) to get the work island done.
After Glenn put the patch in, I had the task of mudding it. I think I had put one coat of mud on last time I wrote, and was not expecting it to go well overall. Doing the drywall upstairs though (however horribly) must have been good practice as I did okay this time! It's about an 80% improvement on my last attempt. Phew! So the mud went on, then the primer... then the paint! Walls = done!
 |
| Patched :) |
 |
| Primed |
 |
| Painted Blue! |
We managed to find a good day weather-wise and hauled the unit upstairs and out to the back yard to spray paint it. I thought that would be the easiest way to paint it, instead of having to prime the faux-wood and then paint it. We found a spray paint w/ primer right in it. Yay!
 |
| Before .... that horrible fake wood |
 |
| After .... a gentle "almond" colour |
The next steps are;
1) Attach feet so that it stands off the ground a bit. In a basement that has water through it on occasion, it's a kind of important point. The trouble? The space on the floor where it's going to stand is slanted. Hmmmm. I don't want the work surface slanted, so am going to have to do some magic. My first trick will be to see if I can make the (pre-fab) feet different heights (eek). My second and final trick will be to make my top cut on an angle, which means I'll never be able to use it anywhere else as the whole island will be custom to the angle of the floor.
2) Cut off the top. The entertainment unit itself is too tall to work on comfortably, so I'm going to haul out the saw and chop the top down a bit. The challenge in this is not only that I have to chop it, but that it may have to be done on an angle. See step 1 :-P
3) Get a worktop. I have decided that glass will be the best, easiest to use work surface. It'll allow me to cut on it, to scratch off paint or other various craft materials, and to clean it properly. A friend from work has a connection with glass - his father owns a glass shop here in town. SO, he has advised me that he'll get whatever I need, which means I'll hopefully not spend a fortune getting a tempered piece of glass for my island. He said they might even have a piece in their 'toss' pile from a shower cut to the wrong size or something that I could have for cheap. Yay!
4) Attach the worktop, get a pair of legs to support the other side. Since I wanted the worktop to be more of a square than just the 16" wide rectangle of the entertainment unit, I'm going to have to find legs for the other side. Hopefully the Habitat store will have the height we need, which will be another 'reuse' piece thus saving the landfill a bit.
If it all works out, I'll be glad to say that the entertainment unit, the worktop, and the legs were all saved from landfill :)

An idea! Are there legs you can get that are adjustable, i.e. like those that are on the bottom of a stove, or a kitchen table? You can unscrew them to be at different heights on each foot. A thought that might make your island installation easier... :)
ReplyDeleteWe did get those ones actually, and the set has feet that wobble (rotate to the angle of the floor). I'm going to try and put them on tonight so that in case all this rain floods the basement, it'll at least be up off the floor!
Delete